
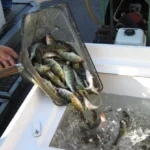


Ever felt that gut-wrenching moment when a fish of a lifetime slips away? More often than not, the culprit isn’t a weak rod or a dull hook, but a knot that just couldn’t hold. You can have the best gear in the world, but if your knots aren’t up to par, you’re leaving potential catches to chance. Learning the Essential Knots Every Angler Should Master and When to Use Them isn’t just about tying string; it’s about building confidence, ensuring your tackle stays put, and ultimately, bringing more fish to the boat. Think of it as your personal handshake with the fish – it needs to be firm and reliable.
Many anglers stick to the same old knot they learned as a kid, and while it might work in a pinch, mastering a few key knots will dramatically improve your success rate and prevent those heartbreaking break-offs. Let’s dive into the real workhorses of the fishing world.
The Foundation: Knots for Attaching Line to Hook or Lure
This is where it all begins. A secure connection between your main line and your terminal tackle (hooks, lures, swivels) is paramount. Mess this up, and nothing else matters.

#### The Uni-Knot: Your Go-To for Everything
Seriously, the Uni-knot (sometimes called the Duncan Loop or Improved Clinch Knot in its single-pass variation) is ridiculously versatile. It’s strong, relatively easy to tie, and works with mono, fluoro, and even braided lines with a little practice. I’ve used this for everything from ultralight panfish setups to musky leaders.
When to Use It:
Tying your main line to a swivel.
Attaching a lure directly to your line.
Creating loop knots for certain lure presentations (though we’ll cover a dedicated loop knot too).
Joining two lines of different diameters (though some knots are better for this).
How to Tie It (the quick version): Pass the tag end through the eye of your hook or lure, then bring it back parallel to the standing line. Wrap the tag end around the standing line 5-7 times. Pass the tag end back through the initial loop you created near the eye. Moisten the knot with saliva (this is crucial to prevent friction heat from weakening the line!) and pull both the tag end and standing line tight, cinching it down against the eye. Trim the tag end.
#### The Improved Clinch Knot: A Classic for a Reason
While the Uni-knot is my personal favorite for its adaptability, the Improved Clinch is another incredibly reliable knot for attaching line to hooks and lures. It’s what many people think of when they hear “fishing knot.” It’s exceptionally strong with monofilament and fluorocarbon.
When to Use It:
Directly attaching lures or hooks, especially when you want a super secure knot with mono or fluoro.
When you need a knot that’s relatively quick to tie and easy to remember.
How to Tie It: Similar to the Uni, pass the tag end through the eye. Wrap it around the standing line 5-7 times. Now, instead of going back through the first loop, you pass the tag end back through the large loop you just created. Moisten, pull tight, and trim. The key difference is that second pass through the large loop, making it more secure.
Building Your Rig: Knots for Terminal Tackle and Leaders
Beyond just tying on a lure, you often need to connect different parts of your rig, like attaching a leader to your main line or creating loops.
#### The Perfection Loop (or Surgeon’s Loop): For a Perfect Presentation
A loop knot is essential when you want your lure to have maximum freedom of movement. Think jerkbaits, topwater lures, or anything that needs to wiggle and dart naturally. A standard knot can cause a lure to trail or twist.
When to Use It:
Attaching lures that require free swinging action (jerkbaits, crankbaits).
When you want to ensure your lure doesn’t get fouled by the line.
How to Tie It: This is a variation of the Uni-knot, but instead of pulling it down tight to the eye, you leave a loop. After wrapping and passing through the initial loop, you pull both ends to create a fixed loop, then pull the tag end away from the loop while holding the standing line, cinching the Uni-knot down next to the loop, not through it. This creates a stable loop that’s perfect for your lure.
#### The Blood Knot: For Joining Lines of Similar Diameter
Need to join two pieces of line, perhaps to extend a leader or connect backing to fly line? The Blood Knot is the classic choice, and it’s surprisingly strong and compact when tied correctly.
When to Use It:
Joining two monofilament or fluorocarbon leaders of the same diameter.
Creating a tapered leader by joining sections.
Joining backing to fly line.
How to Tie It: Lay the two lines parallel. Wrap one line around the other 5-7 times, then pass the tag end back through the first loop you created on the opposite side. Now, take the second line and wrap it around the first line 5-7 times in the opposite direction. Pass its tag end back through the second loop created on the opposite side. Moisten both knots, and gently pull both standing lines to bring the two knots together until they meet flush. Trim tag ends close.
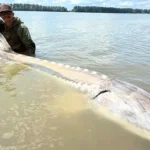
Advanced Connections: When Strength and Security are Non-Negotiable
For bigger fish or situations where you absolutely cannot afford a knot failure, these are the knots that will give you peace of mind.
#### The Albright Special: For Different Line Types
This knot is a champion for joining lines of different diameters or materials, like tying a stout fluorocarbon leader to a thinner braided main line. It’s incredibly strong and surprisingly slim.
When to Use It:
Connecting braided main line to a monofilament or fluorocarbon leader.
Joining lines of significantly different diameters.
How to Tie It: Lay the thicker line across your index finger. Drape the thinner line over the thicker line, leaving a tail of about 6 inches. Wrap the thinner line around both the thicker line and its own tag end about 8-12 times. Then, take the thinner line’s tag end and pass it back through the loop formed by the thicker line, underneath where you started wrapping. Now, hold the thicker line and its tag end firmly. Take the thinner line’s standing part and pull it. This will start to cinch the wraps. Moisten, and then pull both standing lines to fully seat the knot. Trim the tag ends.
#### The Palomar Knot: Simple, Strong, and Great for Braid
The Palomar Knot is incredibly simple to tie, extremely strong, and works wonderfully with braided lines. Its primary advantage is its symmetry, meaning it doesn’t have sharp bends that can weaken the line.
When to Use It:
Attaching lures and hooks, especially with braided line.
Tying swivels.
When you need a quick, reliable knot in the field.
How to Tie It: Double over your line to form a loop about 6 inches long. Pass this loop through the eye of your hook or lure. Tie a simple overhand knot with the loop and the standing line, without tightening it. Now, pass the entire loop over the hook or lure. Pull both the tag end and standing line to tighten the knot. Moisten and trim. It’s that straightforward!
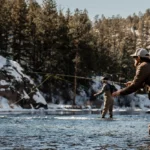
Mastering the Art: Practice Makes Perfect
Learning Essential Knots Every Angler Should Master and When to Use Them isn’t something you can do by reading an article alone. You need to get your hands dirty (or rather, your fingers tangled!).
Practice at Home: Keep some scrap line and a few old hooks or paperclips handy. Tie these knots over and over until they become second nature. Do it while watching TV, during a slow lunch break, or even while waiting for the kettle to boil.
Visual Aids are Your Friend: While I’ve given you the basics here, watching video tutorials can be incredibly helpful for visualizing the process. There are tons of great resources online.
* Test Your Knots: Before you head out on a serious trip, tie your chosen knots with your actual fishing line and give them a good tug. See which ones hold the best for your line type. There’s no substitute for experience.
Final Thoughts
So, there you have it – a solid foundation for building bulletproof connections on your fishing line. Investing a little time in learning these Essential Knots Every Angler Should Master and When to Use Them will pay dividends in lost fish and increased confidence on the water. Don’t let a weak knot be the reason your next big catch swims away.
Now that you’ve got the knowledge, are you ready to tie one on and test your new skills?

